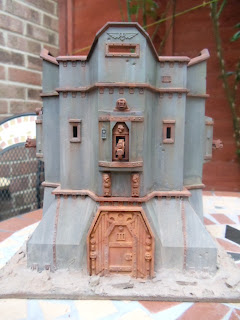
The last step is pretty similar to the first rust step. I got a mixture of pigments to give me more tonal difference which is the key to realism. I've used rubble dust, brick dust, dry mud and a tiny amount of african earth.
Same as with the rust you now just have to literally just put it on dry with the brush at irregular intervals all over the ground.
Next grab a fairly wide brush and load it with thinners for washes and soak and mix all the thats on the base, randomly remember and dont worry about splashing a little up the side of the building.
It will look a little like this once done.
Then once dry it will lighten up considerably and look like this.
Now we want the building to fit in with the base. This is called homologation, its tieing the entire model into one cohesive model. to do this to the building we have to be slightly more subtle about it. we have to add multiple pigments again but with a dry brush and this time we brush into the suface of the model. I didnt do it all the way up the model just halfway up the first section.
Next you have to touch the area lightly with a brush loaded with thinners for washes and let capillary action soak it into the pigment. I then brushed it downwards to thin it out and mix the colours.
Now when this dries it will look unnatural as the pigment will just abruptly stop.
To fix this you take a large brush thats dry and clean and brush, rub, flick the pigment upwards blending the colours gently into the building. Once its to your satisfaction thats it. All done. Congratulations, with no massive detail work or crazy artistic skills you made a realistic building.


No comments:
Post a Comment