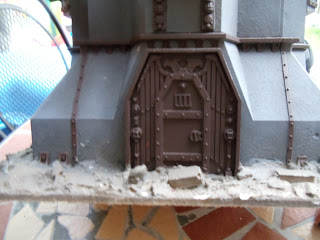
The next stage is simply adding the pigments. I've used Mig pigments, old rust, standard rust and new rust. I also used thinners for washes from Mig as it will give me more working time than just using the fixer.
I mixed the thinners with the old rust on my palette and just painted it onto the brown areas.
Once you have done all that its time to employ the other two shades of rust. Rust is pretty random so take a dry brush and load it with pigment and tap and dab it ad hoc all over the rusty area. Repeat this with all the tones it your possession.
I'm concentrating on the door as its the largest area on this model and my photography is terrible. Now its loaded with pigment take one medium to large brush or whatever you are comfortable with and load it with the thinner for washes. Now take it to the pigment and as this is a vertical surface i will brush like wise to mix and blend the colours. The thing with pigments is that until they dry you cant really see how its taking effect.
If when its dry you dont think its blended enough or you want to add more pigment that is fine to add more or to blend just use more thinner or take a dry brush a gently work the pigment about.
Adding pigment and then just gently touching it with the fixer will also give you texture as you can see on the door. I realise this a quick run through but the basics are sound and weathering really needs to be experimented with. You can add the pigment wet, dry with thinners or water and they all have their pros and cons but you really need to try them to learn how they behave. Being told really cant justify how easy and versatile these products are.


No comments:
Post a Comment